Keck Computational Science Center
How to Create a Template
Templates enables users to create instances with the operating system already installed and ready to be used immediately after the instance is created. Another usage of templates is to take an existing template and extend it by installing additional software on top of it. For example, taking a template that just contains the Windows 7 operating system (and no additional software) and installing Visual Studio on top of it.
Note: This guide details how to create a template, starting with uploading the ISO file of the operating system to CloudStack. If the ISO file has already been uploaded to CloudStack, start with step 5. If you are extending an existing template by installing additional software on top of it, start with step 8 after you install the software on your instance.
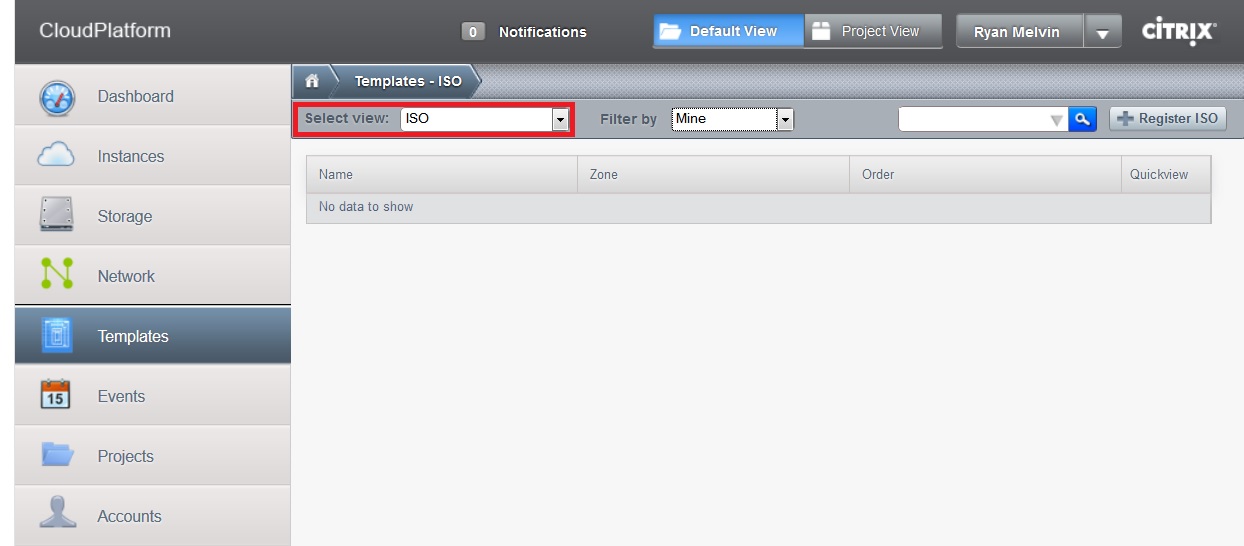
1. After logging in, click on the "Templates" tab.

2. Set "Select View" to "ISO".
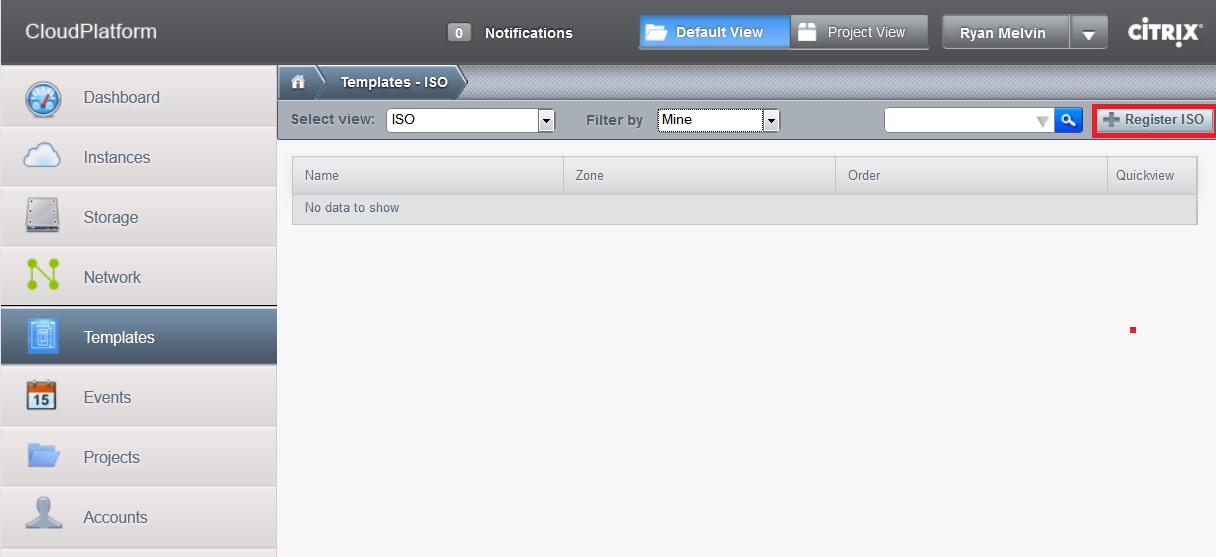
3. Click on the "Register ISO" button.
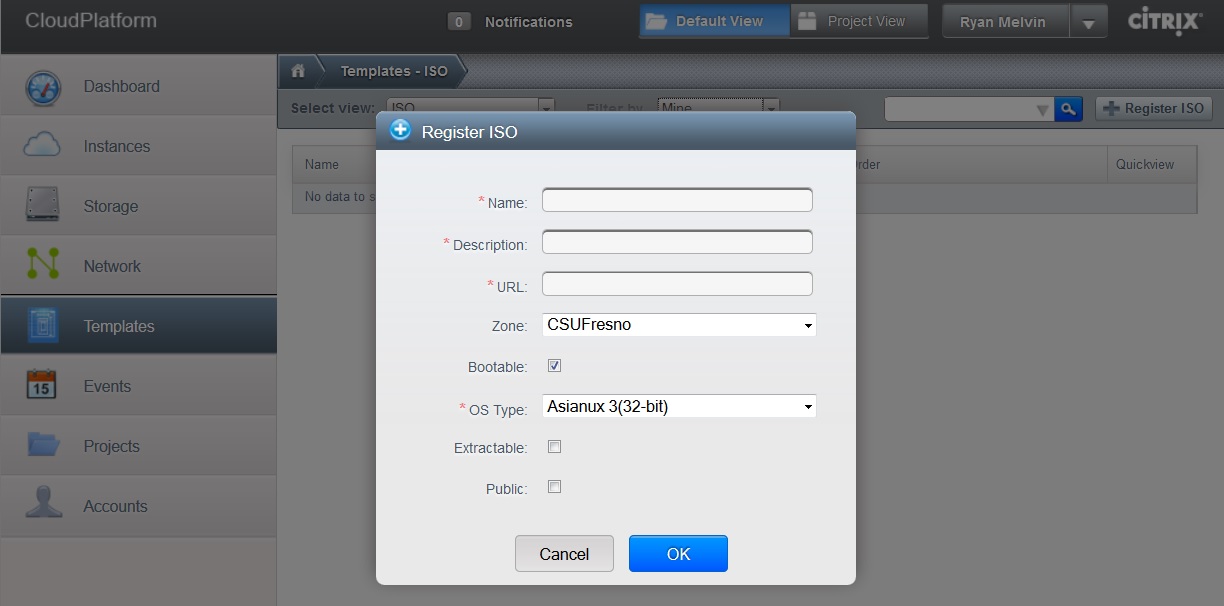
4. In the "Register ISO" dialog box (shown below), the following fields need to be filled out:
Name: A descriptive name of the operating system. For example, "Windows 7 Professional 64-bit".
Description: This can be the same as what was put for the Name field.
*URL: Link to the ISO file on the internet.
OS Type: The type of OS should be chosen from the drop-down list. For example, if the ISO file is for a 64-bit version of Ubuntu, then "Ubuntu (64-bit)" should be selected.
Public: This should be checked if you want the ISO file to be publicly available to all other users. Leave this unchecked if the ISO file is for your private use only.
*CSCI students can obtain ISO files (and product keys) for Windows operating systems for free from http://msdn06.e-academy.com/CSUFresno_CS/index.cfm?loc=main?. The ISO files for Linux operating systems can be obtained from the developers' website. For example, the ISO file for the latest version of Ubuntu Linux can be obtained from http://www.ubuntu.com.
5. After clicking "OK", the ISO file will be downloaded to CloudStack (this may take several minutes). The ISO file will be listed under the Templates tab (if Select view is set to "ISO") once it has finished downloading.
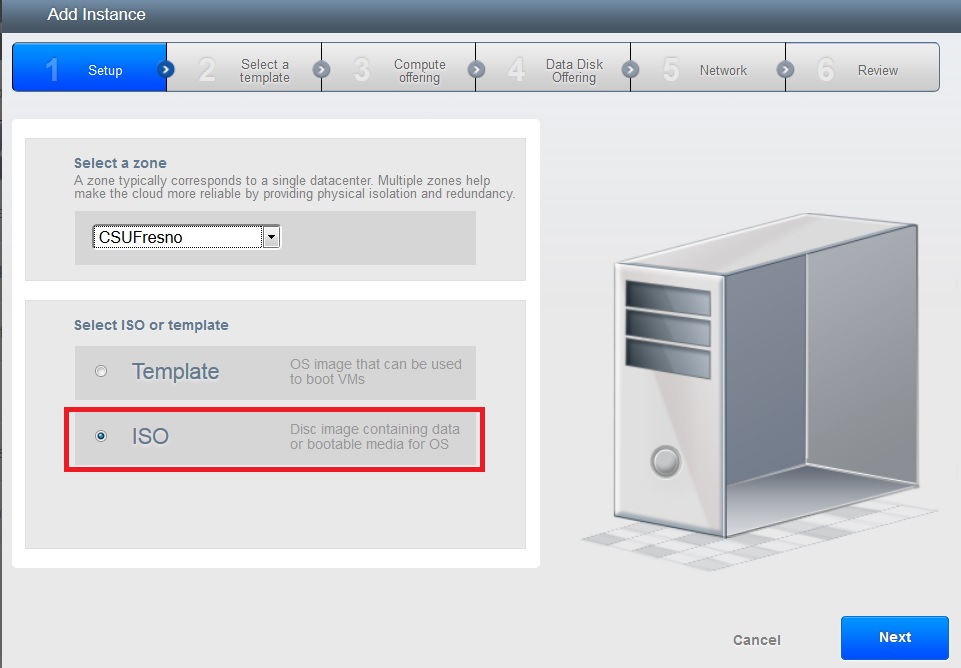
After the ISO file has been downloaded to CloudStack, click on the instances tab,
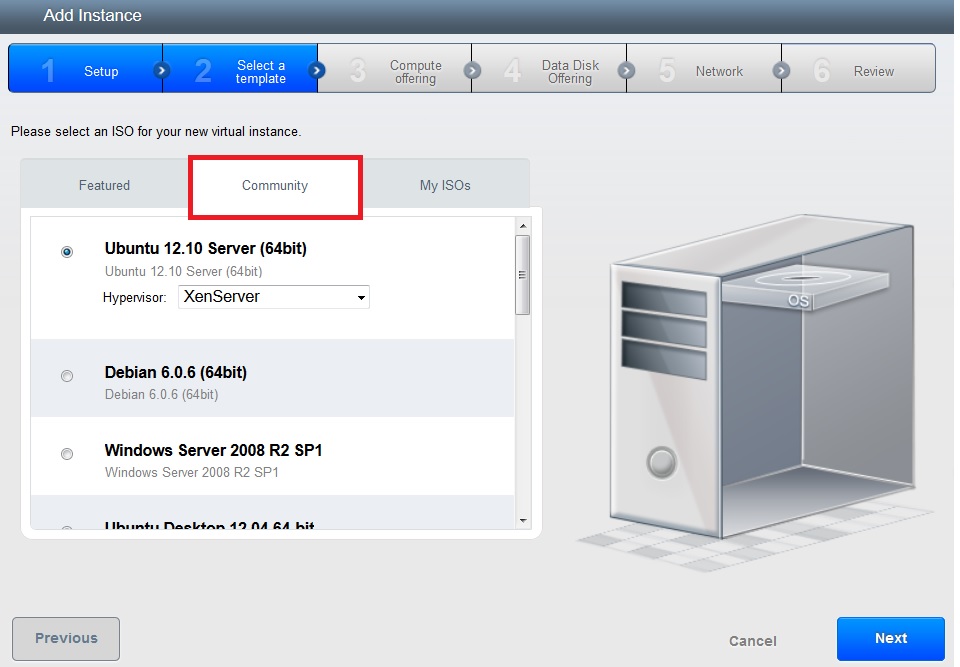
and create a new instance. On the first screen (shown below), select "ISO".
6. On the second screen, click on the "Community" tab and select the ISO file you
uploaded from the list.
7. Continue with the remaining steps to create the instance. After the instance has
been created, connect to the instance and install the operating system. If it is a
Windows operating system, then sysprep should also be ran.
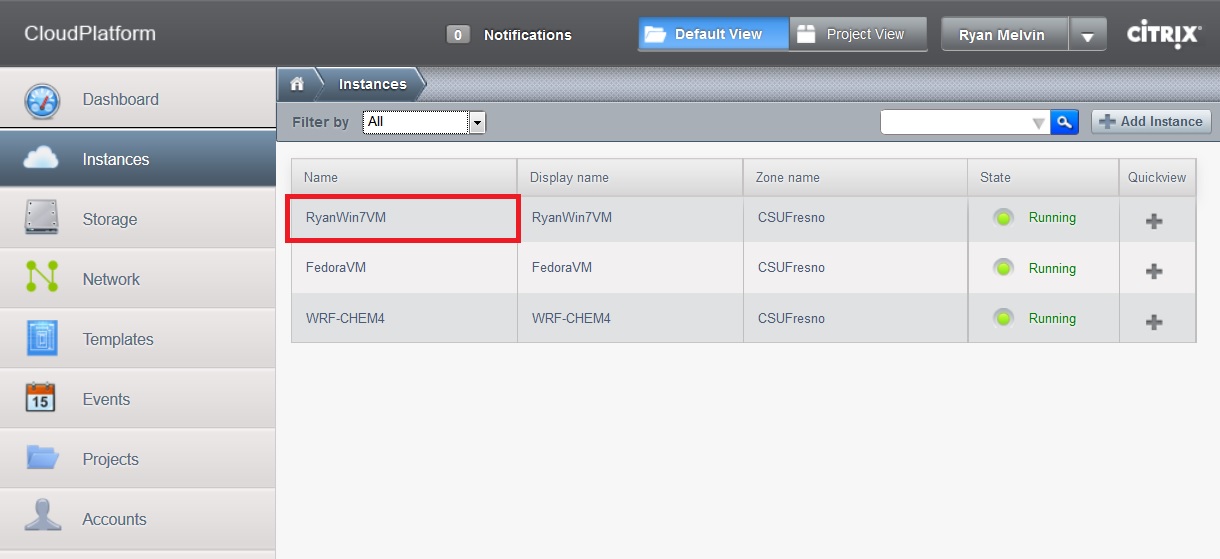
8. After doing the above, click on the name of your VM under the Instances tab.
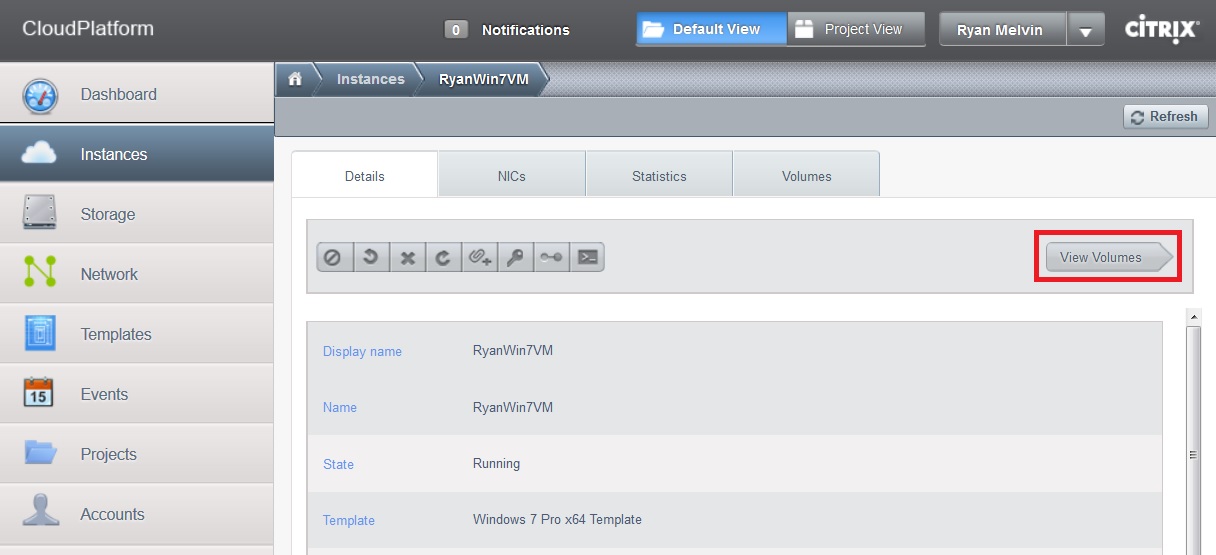
9. Click on the "View Volumes" button.
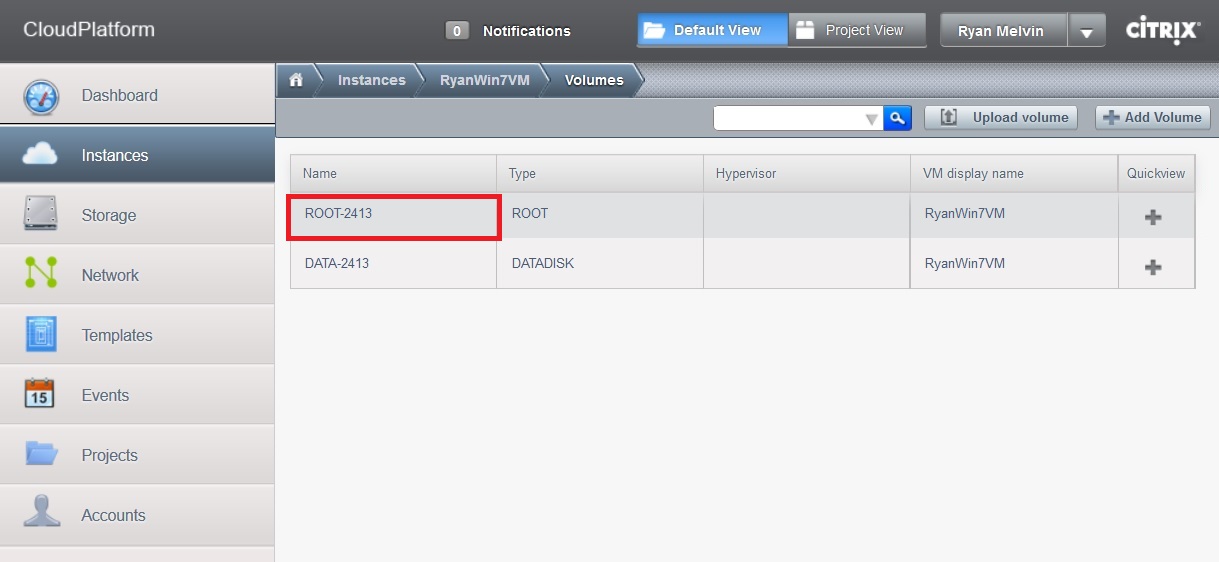
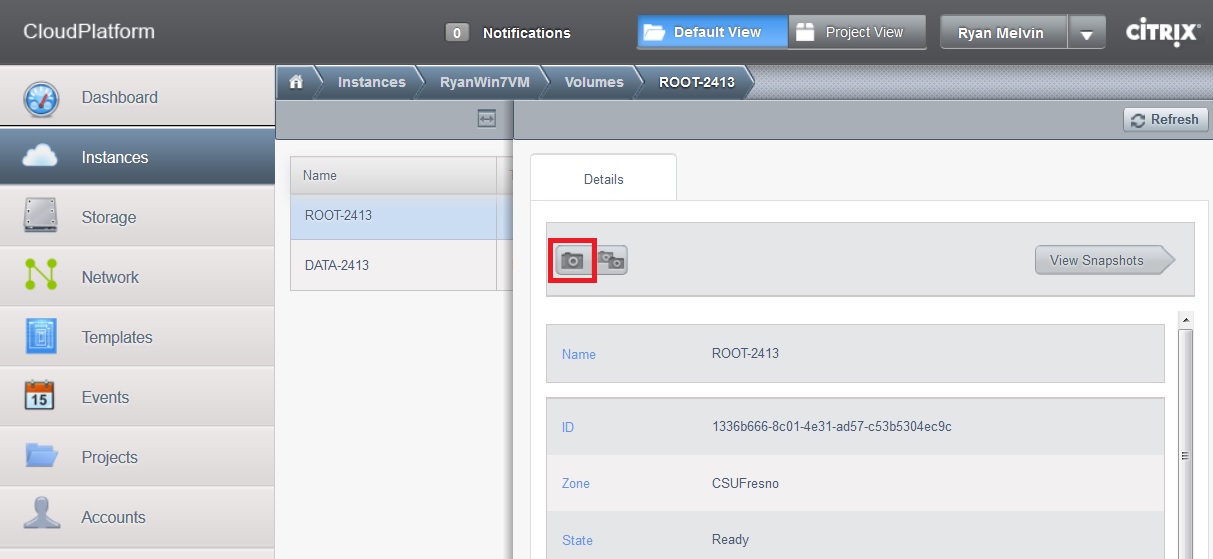
10. Click on the Root volume.
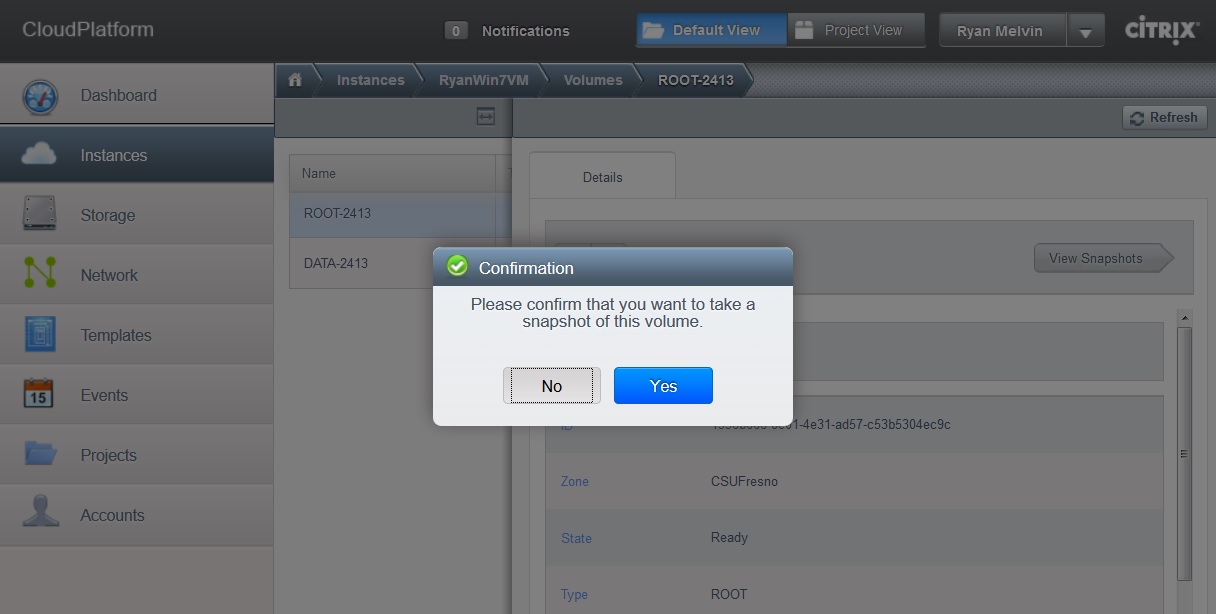
11. Click the "Take a Snapshot" button.
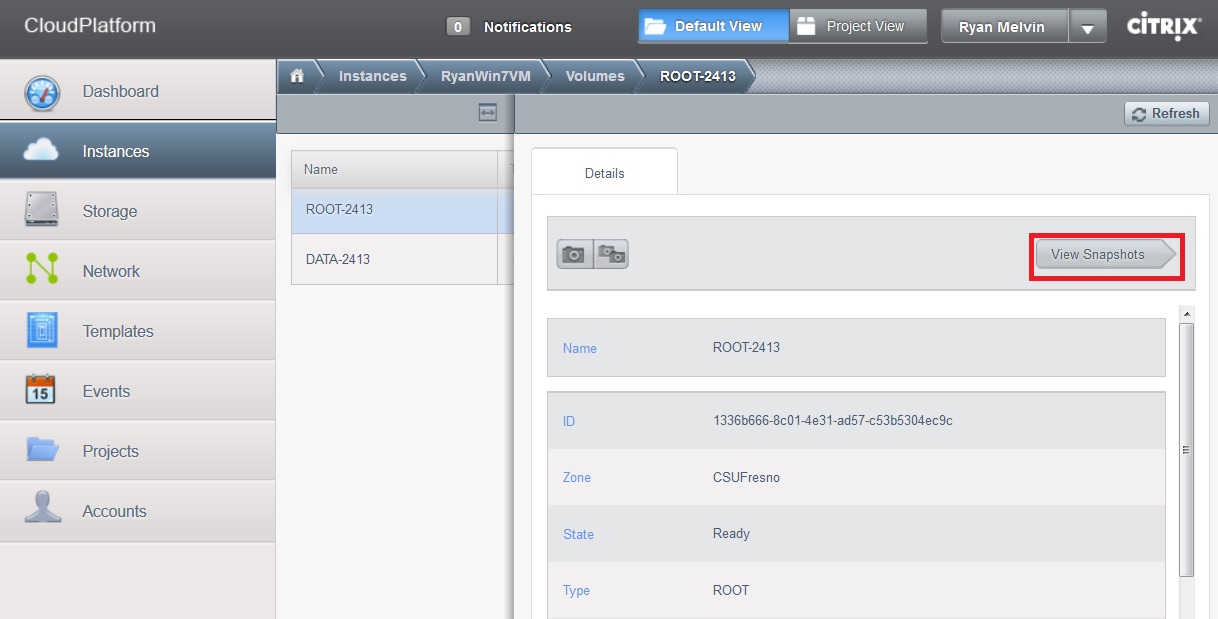
12. Click "Yes" to create the snapshot (this may take several minutes).
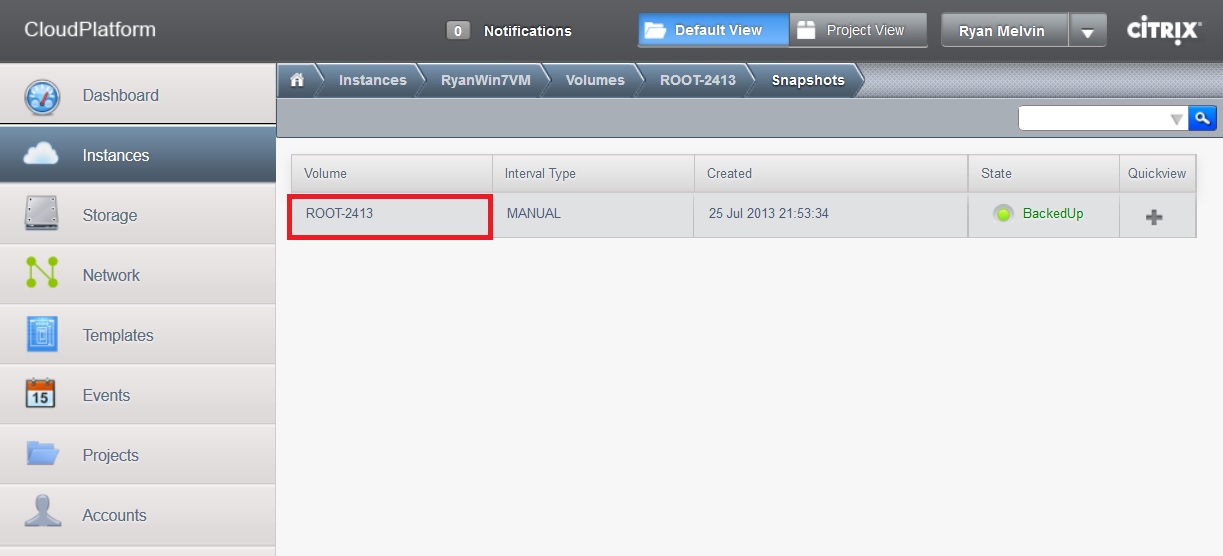
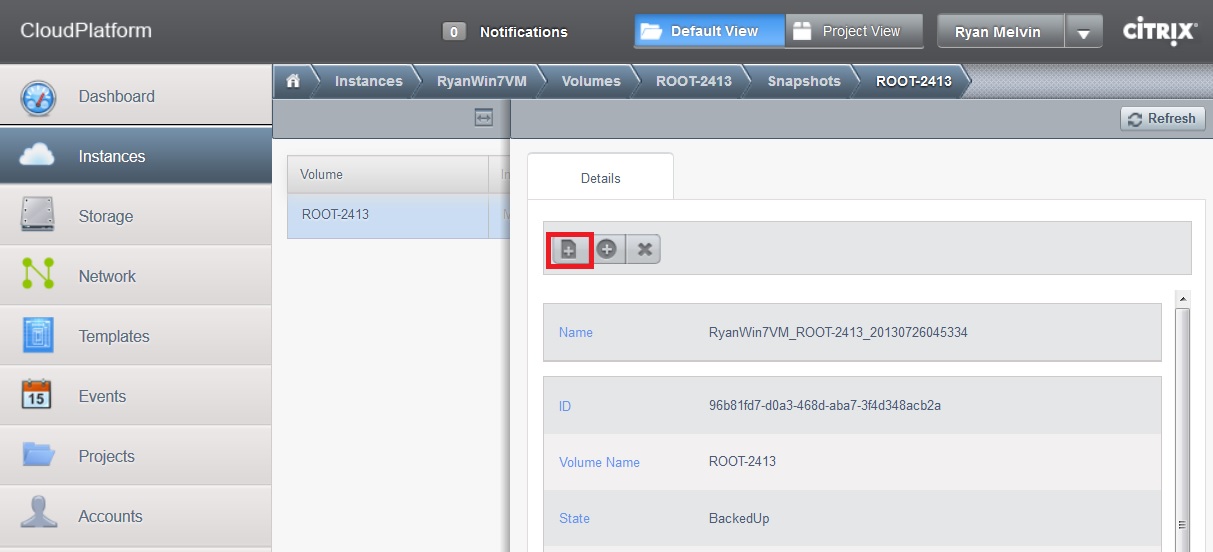
13. After the snapshot has been created, click on the "View Snapshots" button.
14. Click on the snapshot that you just created.
15. Click on the "Create a Template" button.
16. In the "Create Template" dialog box (shown below), the following fields need to be filled out:
Name: A descriptive name of the operative system. For example, "Windows 7 Professional 64-bit".
Description: This can be the same as what was put for the Name field.
OS Type: The type of OS should be chosen from the drop-down list. For example, if the ISO file is for a 64-bit version of Ubuntu, then "Ubuntu (64-bit)" should be selected.
Public: This should be checked if you want the template to be publicly available to all other users. Leave this unchecked if the template is for your private use only.
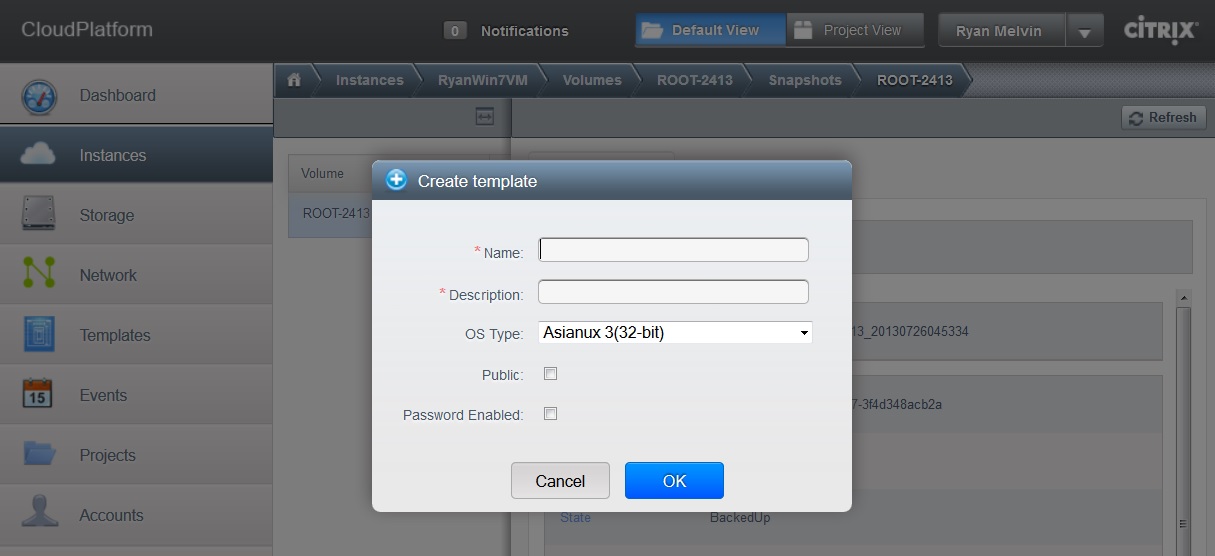
17. After Clicking "OK", the template will be created (this may take several minutes) and available for users to use. The template will also be listed under the Templates tab if "Select view" is set to "Templates".