Keck Computational Science Center
How to Setup Your Network to Enable Internet Access
1. First of all login to Cloud Stack web portal using your credentials. Once you are
successfully login to CloudStack, you will see the Dashboard screen similar to the
screen shown below. To set the network configuration for the virtual machine, click
on the network tab on the left side in the vertical menu (as shown in the rectangle
box). After clicking the Network tab, you will see all the networks. Select the desired
network by clicking on the network name as shown in the below example. 
2. Once you click on the network name as shown in the above screen, the screen shown below will appear. Then click on the "View IP Addresses" button.

3. Now, you will see the IP address of the virtual machine. Click on the IP address of the virtual machine as shown in the below screen.

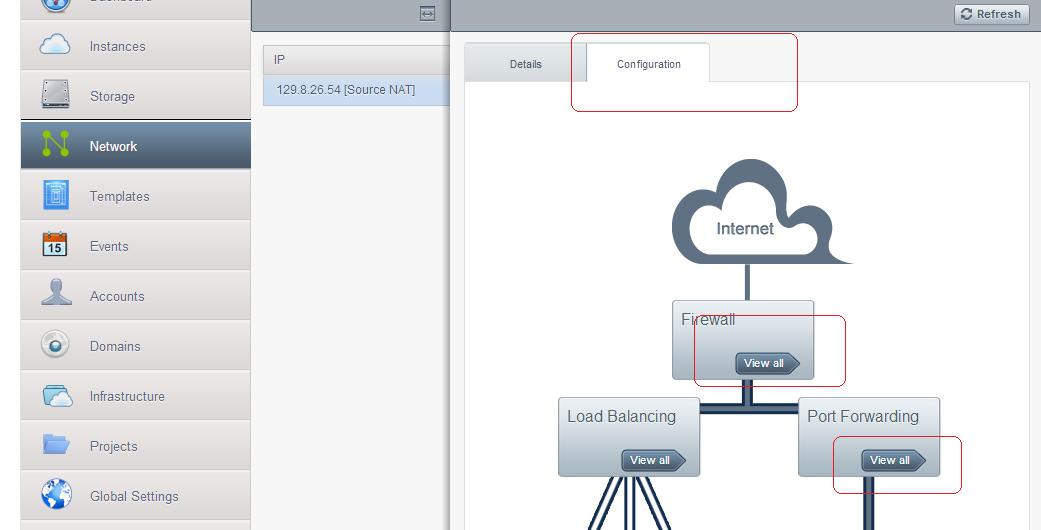
4. Then Click on the configuration button, you will get the screen similar to below screen. In this screen we are going to set the Firewall setting and port forwarding setting.
5. Let us firstly setup the firewall setting: click on the view all button as shown
in the above screen. The below screen will appear. Then set the following values,
Source CIDR as 0.0.0.0/0, Protocol as TCP, Start port as 22 and End port as 22 as
shown in the below screen. Then click on the "Add" button. Once added you will see
the image like below.

6. Set the port forwarding configuration: click on the IP address shown in the top panel in the below screen (Do not click the back button of the browser; otherwise you have to navigate again to reach this screen). Then click on the "View All" button on the port forwarding setting as shown above in the step 4. Then set the private port as 22 and public port as 22. If you are using some other port number, you need to mention that port number. Then click on the add VM button and the setting will be added as shown below. Then you will be asked to select the instance that you want this rule to be applied on.


7. Now go back to the networks tab on the left side bar and select your network again. Click on the "egress" tab set source CIDR to 10.1.1.0/24 and select protocol to "All" then click add. Should look something like the images below if it was added properly.


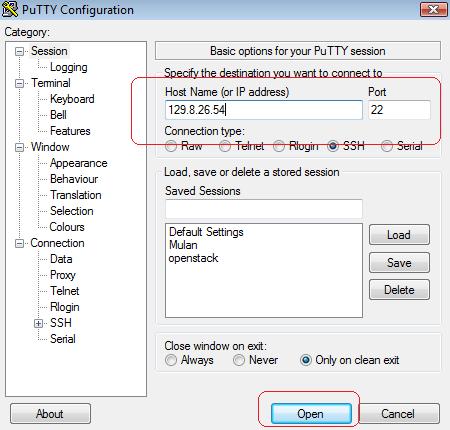
8. To test whether the setting in working properly or not: Open the putty tool and
enter the IP address of your virtual machine and enter the port number, then click
on the open button.
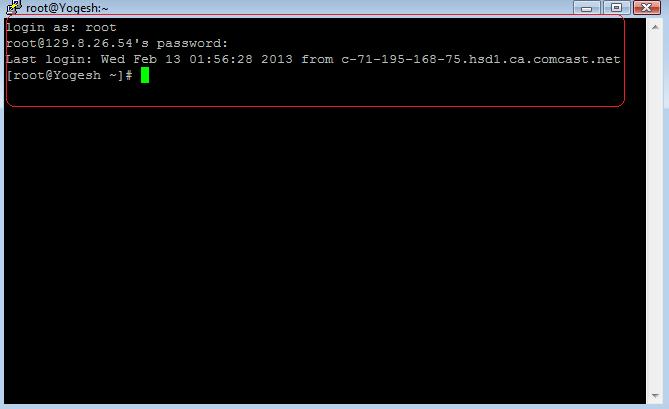
9. After click the open button in the above screen, you will get a similar screen
if you connect your CentOS 5.6 instance. It will ask for the username and password
for the Virtual machine. By default, the username is "root" and password is "password".
Given your correct credential, you will be able to login successfully and you will
get the virtual machine shell prompt. Now we are ready to use the virtual Machine.
Don't forget to change your root's password at the first!