Keck Computational Science Center
How to Connect to your CloudStack Instance Using Putty
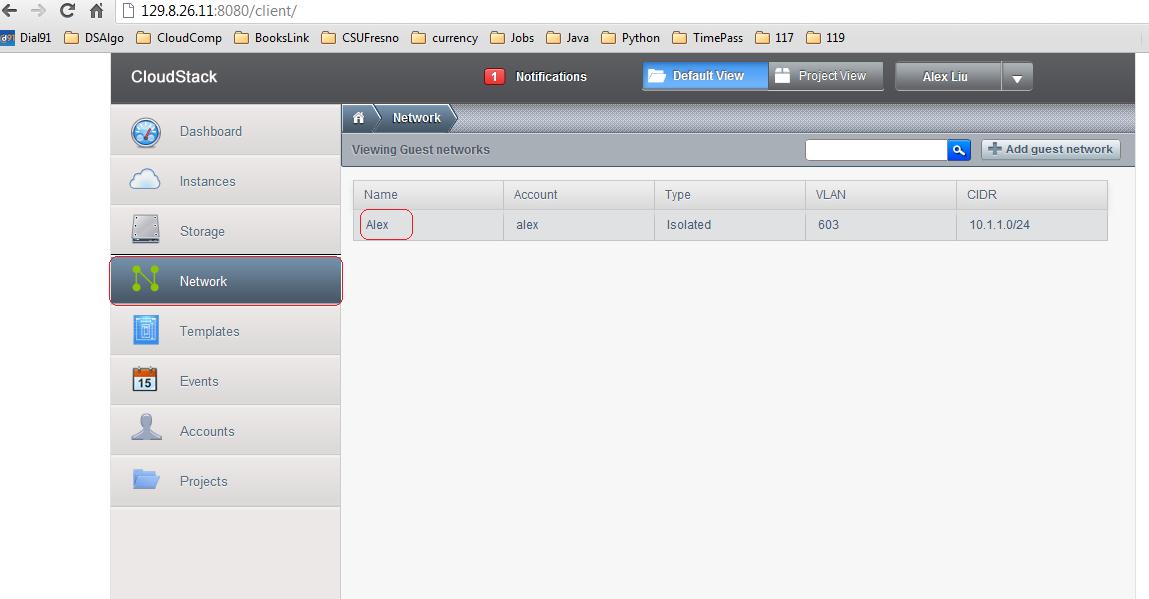
1. In order to connect to a VM via Putty, we need to first obtain the VM's IP address
from the CloudStack GUI. To obtain the IP address of the VM, click on "Network" in
the left pane as shown in the screen below. Then click on the name of the virtual
name (as shown in the red rectangular box below).
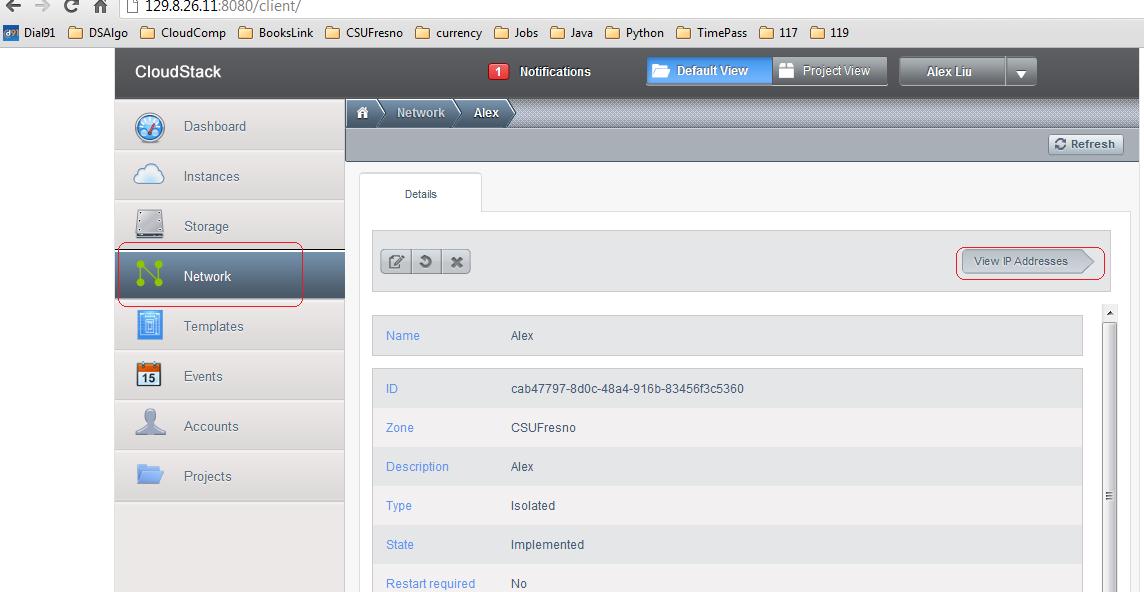
2. After clicking the name of the virtual machine, the screen shown below will appear.
Then click on the "View IP addresses" button on the right side of the screen (as shown
in the red rectangular box below).
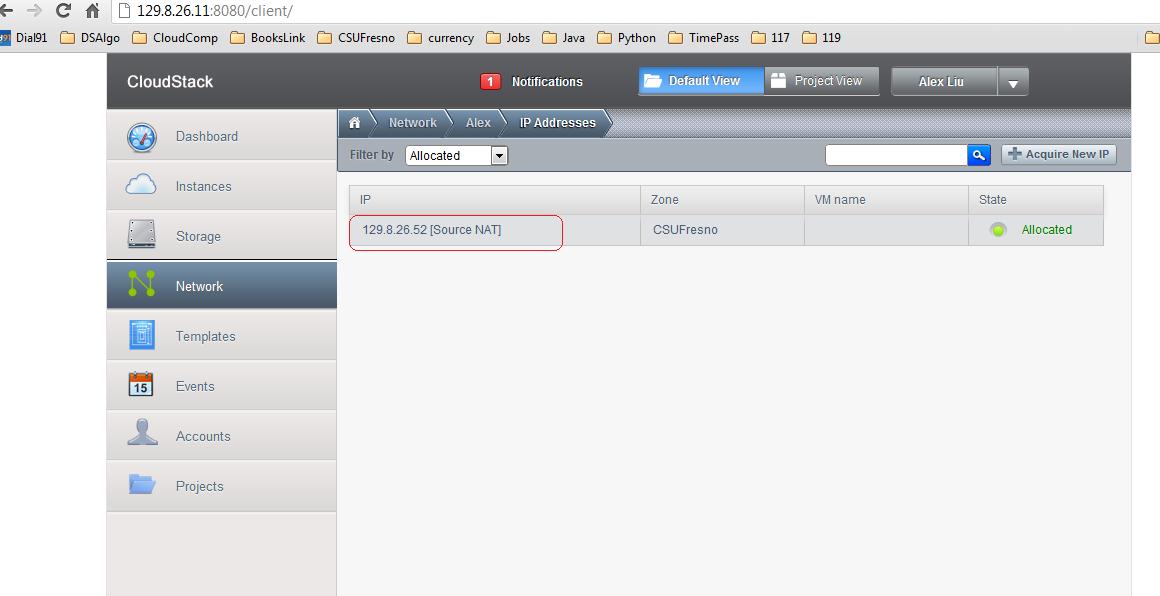
3. After clicking the "View IP addresses" button, the screen shown below will appear.
It will show the IP address of the virtual machine (as shown in the red rectangular
box below).
4. Now that you have obtained your VM's IP address, you can connect to it via Putty.
If necessary, you can download Putty for free from http://www.putty.org/. Then start the Putty application from your desktop.
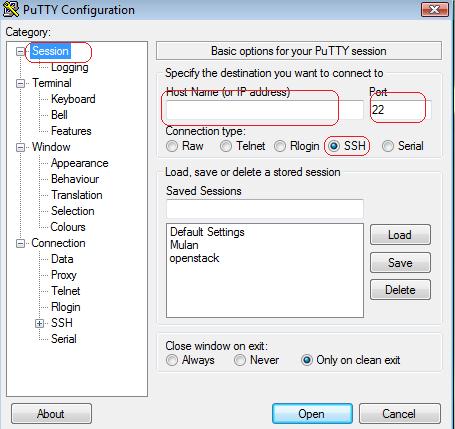
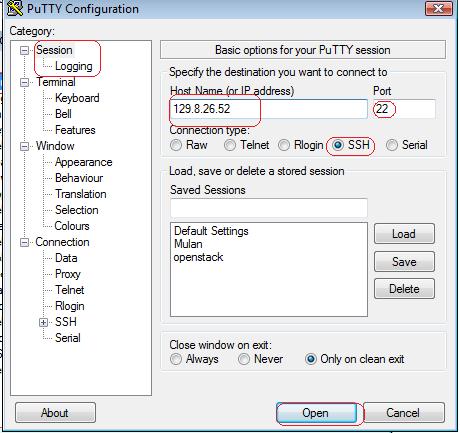
5. After starting the Putty application, the screen shown below will appear.
Make sure the initial settings are the same as in the screen shown above. The port number should be 22, and the connection type should be SSH.
6. Now enter the IP address of the virtual machine in the "Host Name" field (circled
in red in the screen below) and click open.
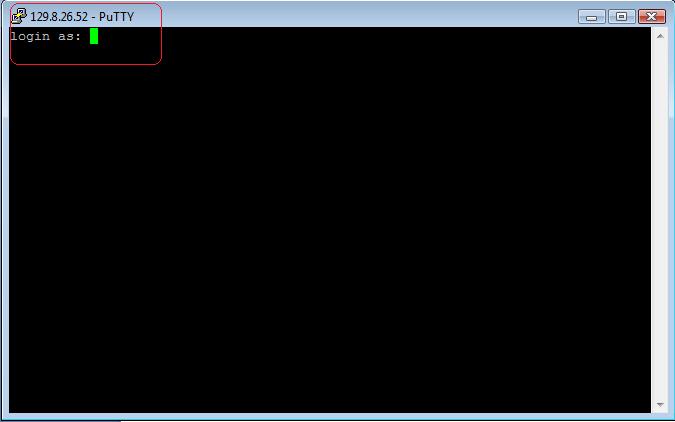
7. After clicking open, the login screen for the VM will appear as shown in the screen
below. Enter your login name and password to login to your VM. In this case, the login
username is "root" and the password is "password".
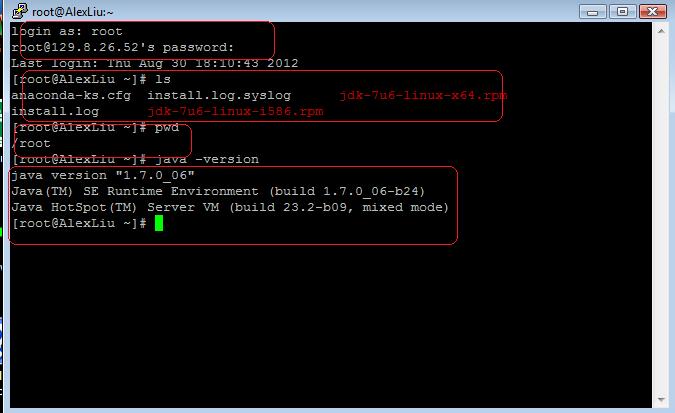
8. After successfully logging into to your VM, your console should be similar to the
screen shown below. The output of a few basic Linux commands is shown.
